


Ladibug Document Camera
How to Use the Ladibug Document Camera in a Class
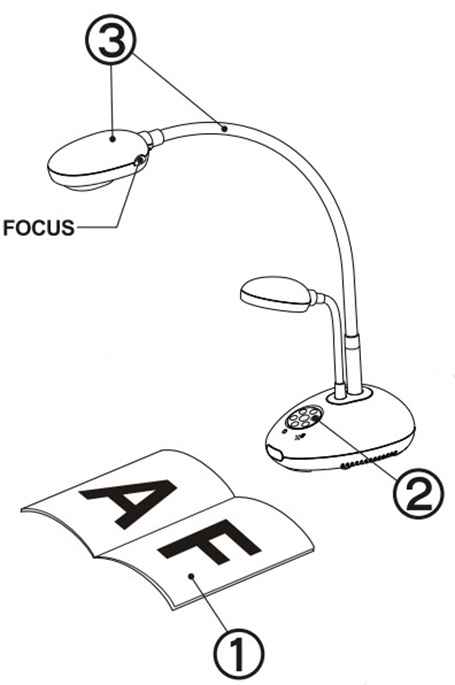
Step 1: Turn on the Ladibug Device
- Place an object to be displayed under the camera.
- Turn on the power.
- Adjust the gooseneck and lens to the appropriate positions.
Note: Each time the lens is moved, locate the camera head and press FOCUS to refocus the lens.
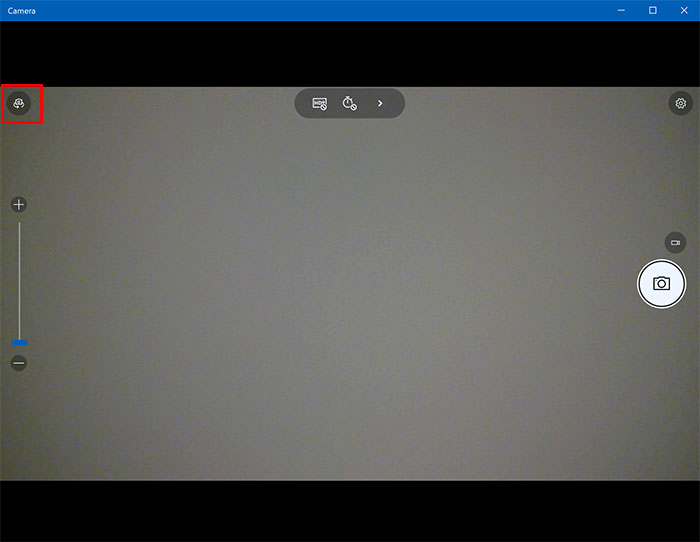
Step 2: Open the Camera Application
- Double-click the Camera icon on the desktop to launch the Camera application.
Note: If you do not see the Camera icon, go to the start menu on the computer, choose all programs, click on the Camera application. - If you do not see the image from the ladibug camera, make sure the correct camera is being displayed by clicking the switch camera button in the top left corner of the Camera application.
Step 3: Display your documents
Keep the following things in mind when displaying your documents:
- When you are ready to display the content to the whole class, simply turn on the projector/TV in the room.
- Utilize the physical buttons on the Ladibug to zoom in and out on the document. In addition, always remember to adjust the focus when you move a document, or move the head of the Ladibug.