

Planner Training Documentation
The Planner product can be used by advisors to help students chart out their pathway to degree completion term-by-term. The Planner’s integration with the Interactive Degree Audit software will ensure that students remain on track in their programs.
Demo
Instructions
1. Search for a student in the typical fashion (either with first/last name or ID).

2. Once the student is populated, click the “Plans” tab.
3. If student does not yet have a plan, click “create a new plan”.
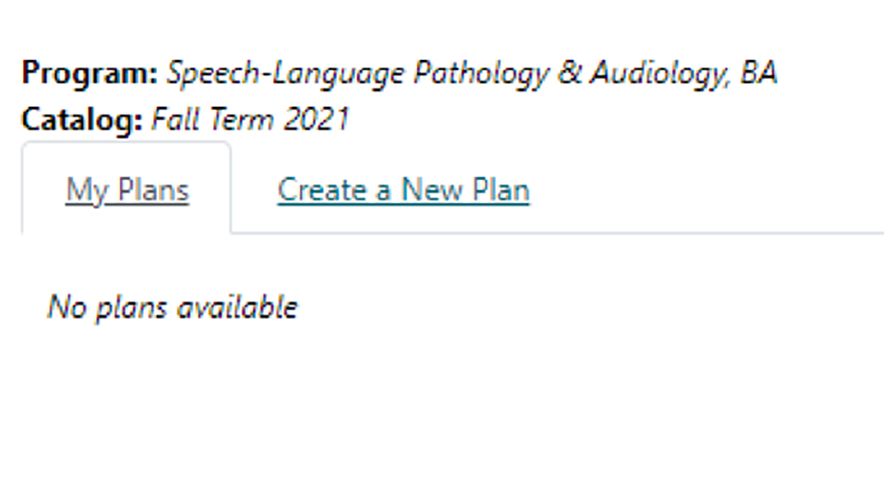
4. From here, you can either use their declared program for their plan or select a different program.

5. Create a name for the plan “First Last [MAJ] Plan”. If student has multiple plans, each name must be unique. Then, fill in the first term of the plan and how many years is expected until graduation. Then, click add plan. *A new plan should be created every time a student has a program update (adding second major, minor, ICT).
![Create a name for the plan “First Last [MAJ] Plan”. If student has multiple plans, each name must be unique. Then, fill in the first term of the plan and how many years is expected until graduation. Then, click add plan. *A new plan should be created every time a student has a program update (adding second major, minor, ICT).](/sites/default/files/2022-03/ancillary-images/planner-training-5.jpg)
NOTE: The “years to graduation” is NOT binding. It just lets the planner know how many terms to populate.
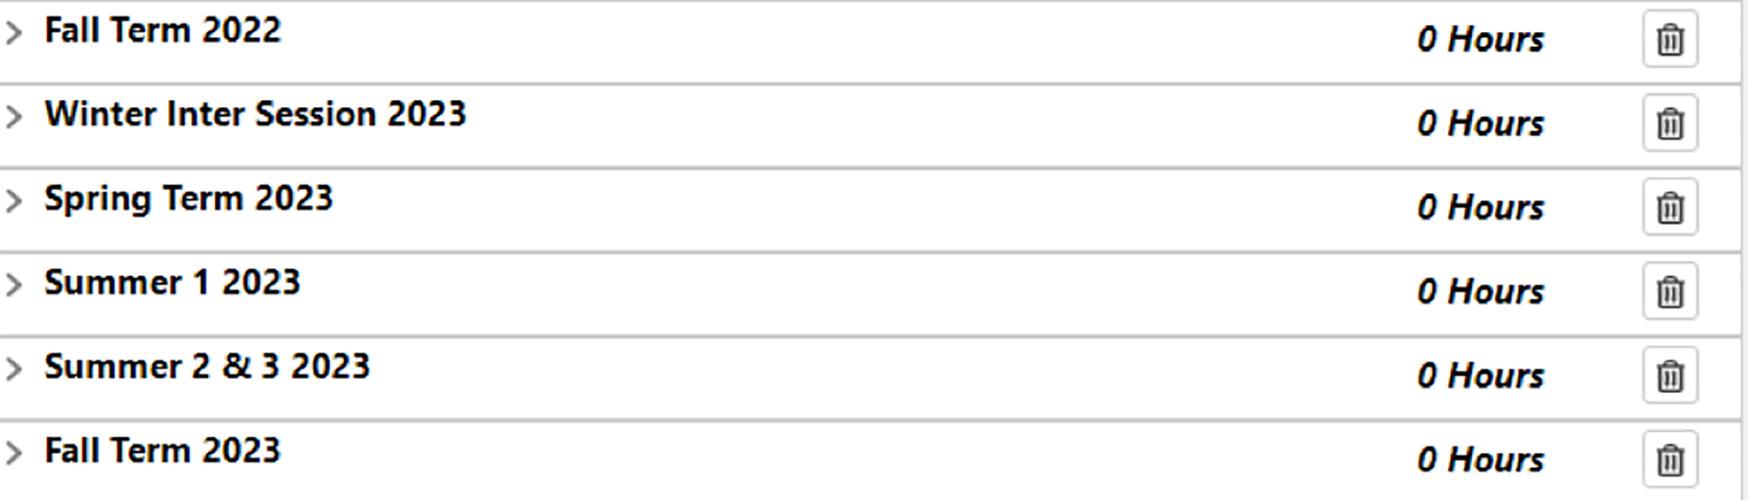
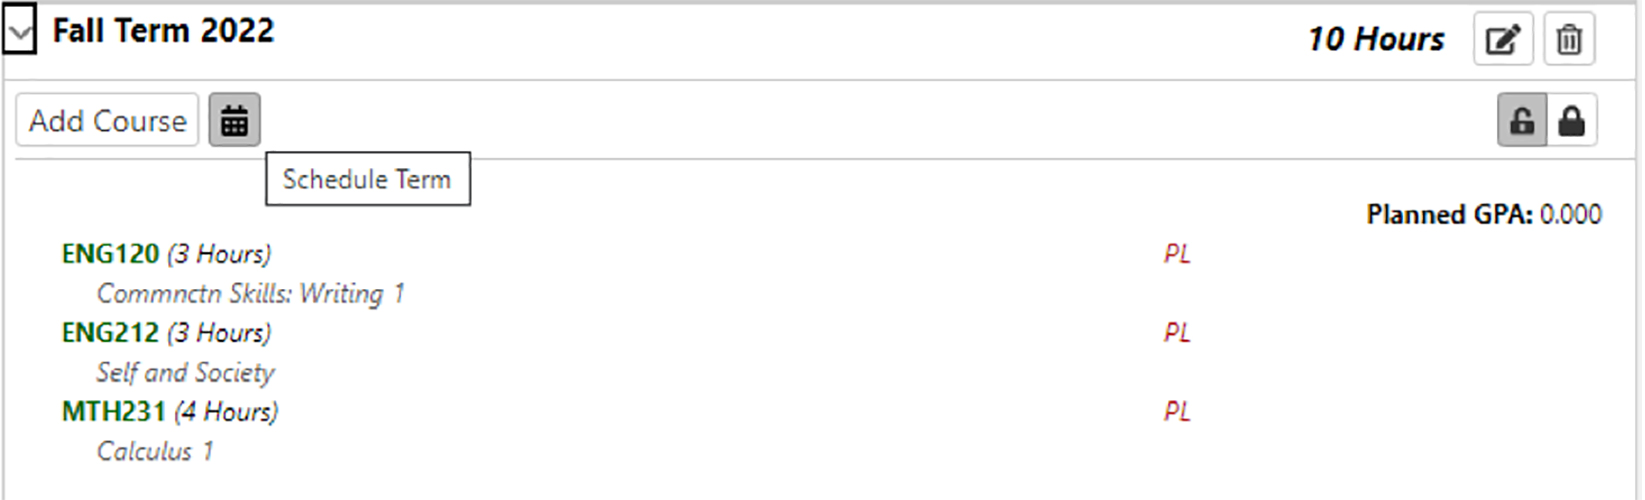
6. Student’s audit will populate on left side of screen and plan will show up on right side. For any terms that will not be used, you can remove them using the trash bin.
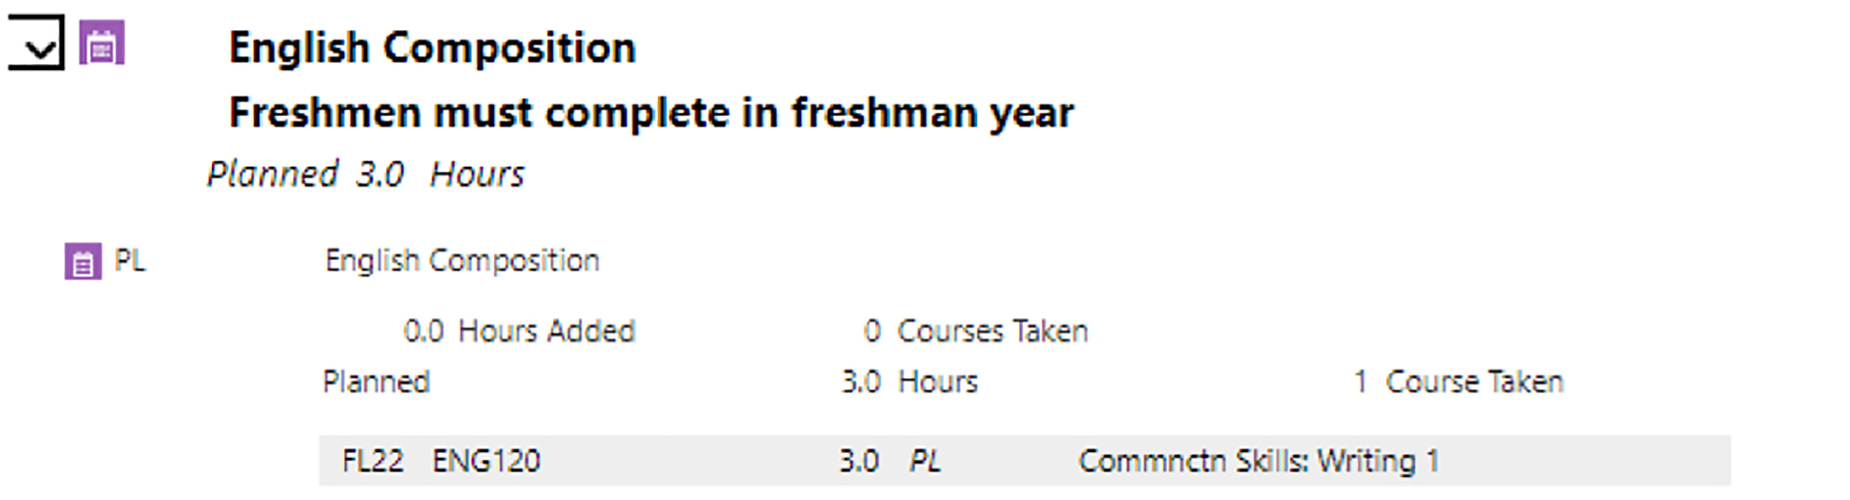
7. To add a course to the plan, you can drag the course from the audit into the term you are advising the student to take the course in. In this case, ENG120 was added to student’s Fall 2022 term.*
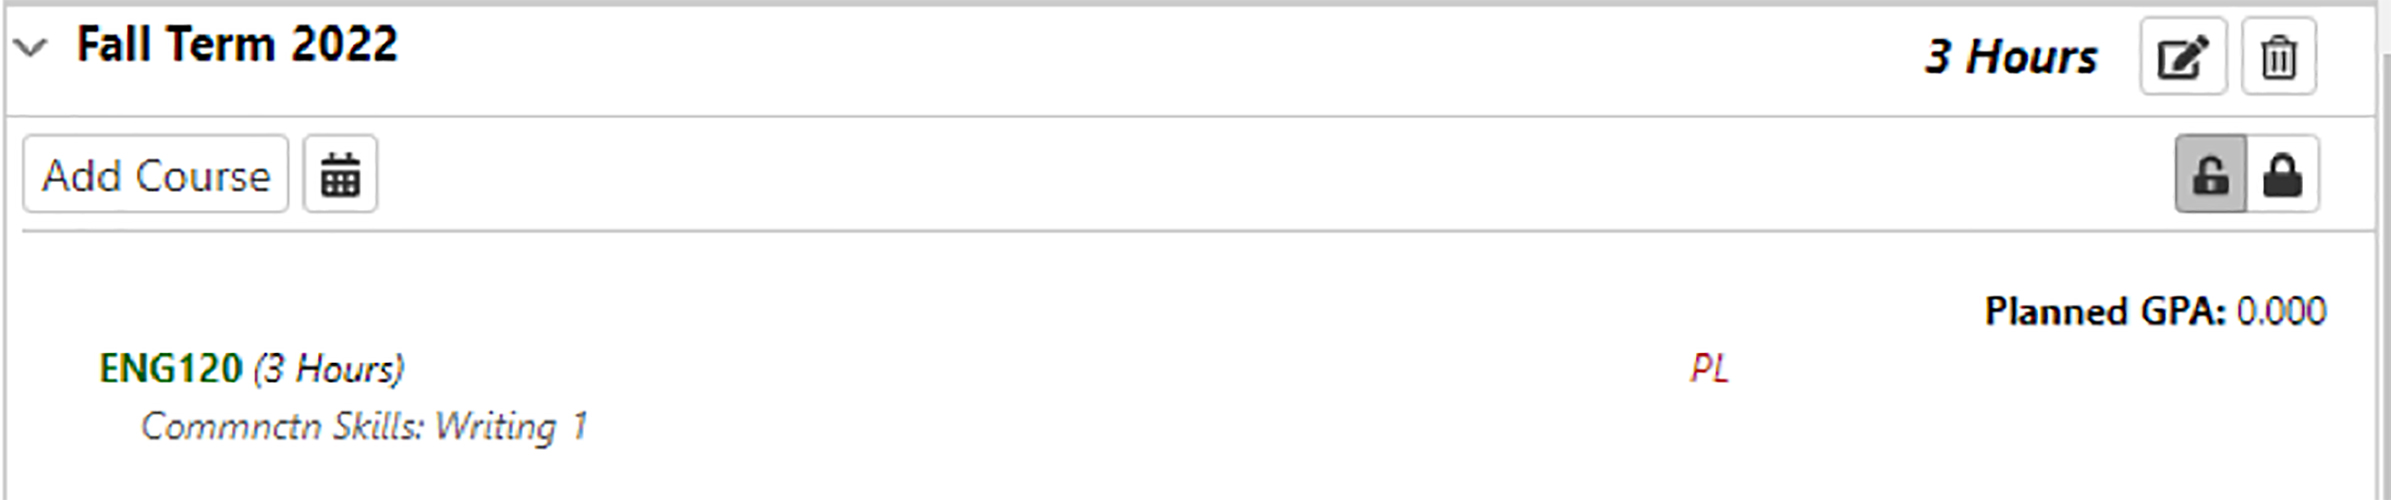
NOTE: The course shows up green, meaning that the course is scheduled for the term AND the student has met any prerequisites for the course (if any).
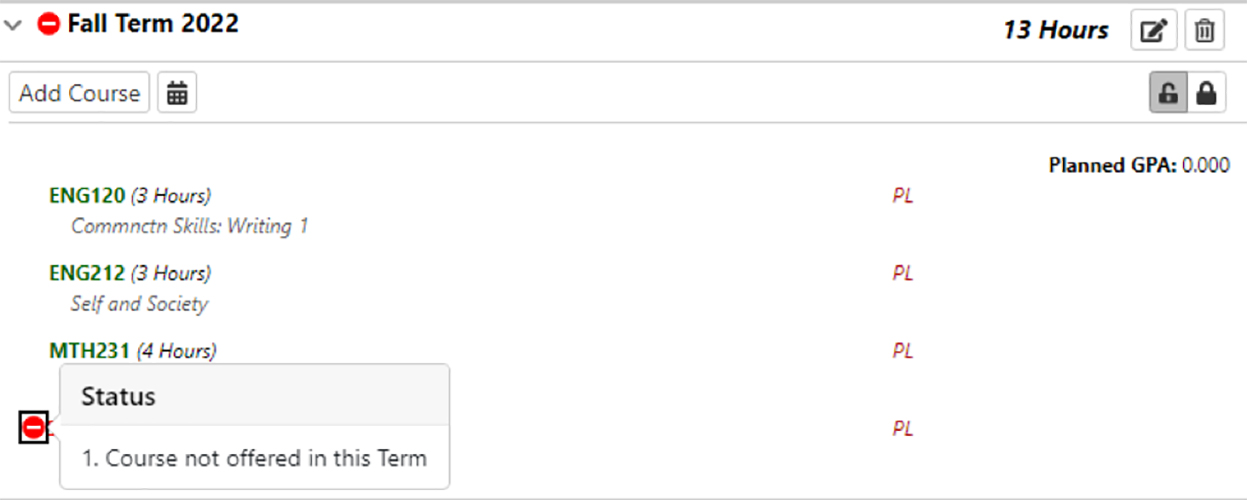
8. If a course is added to a specific term and it shows up red, an indicator will show reasons for course not being viable.
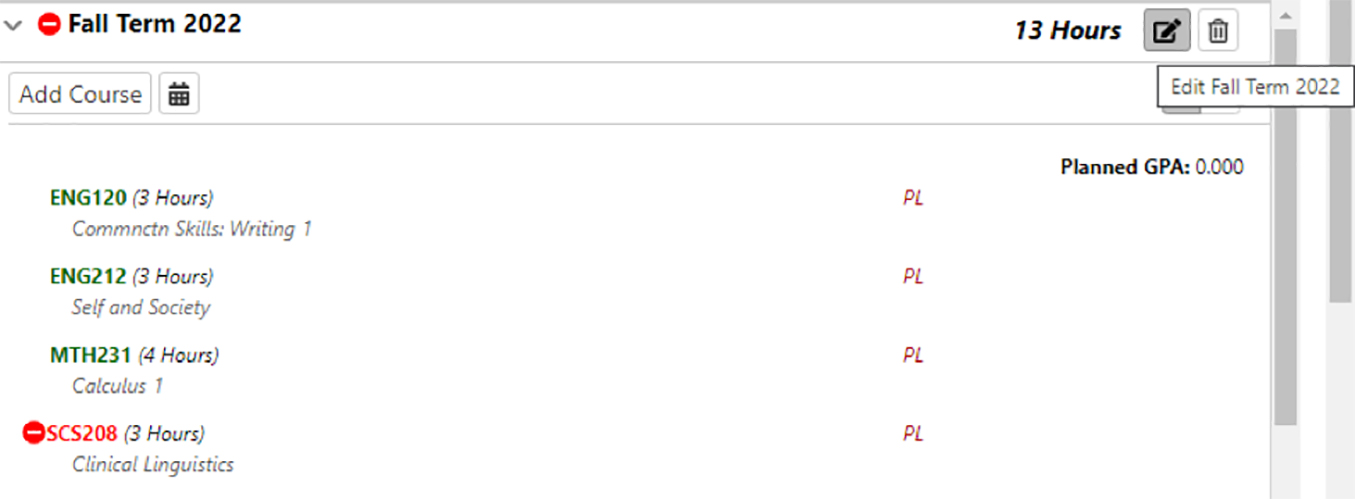
9. You can choose to remove the course from the term or move it to a future term. To delete a course from a term, click the pen and paper icon next to the trash bin.
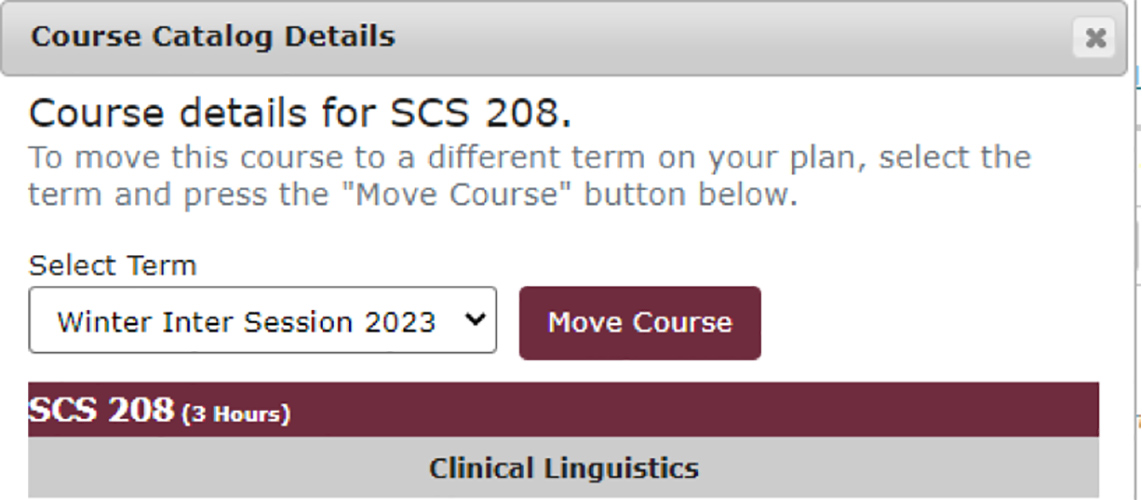
10. To move a course to a future term, click the course and select the term from the drop down menu.
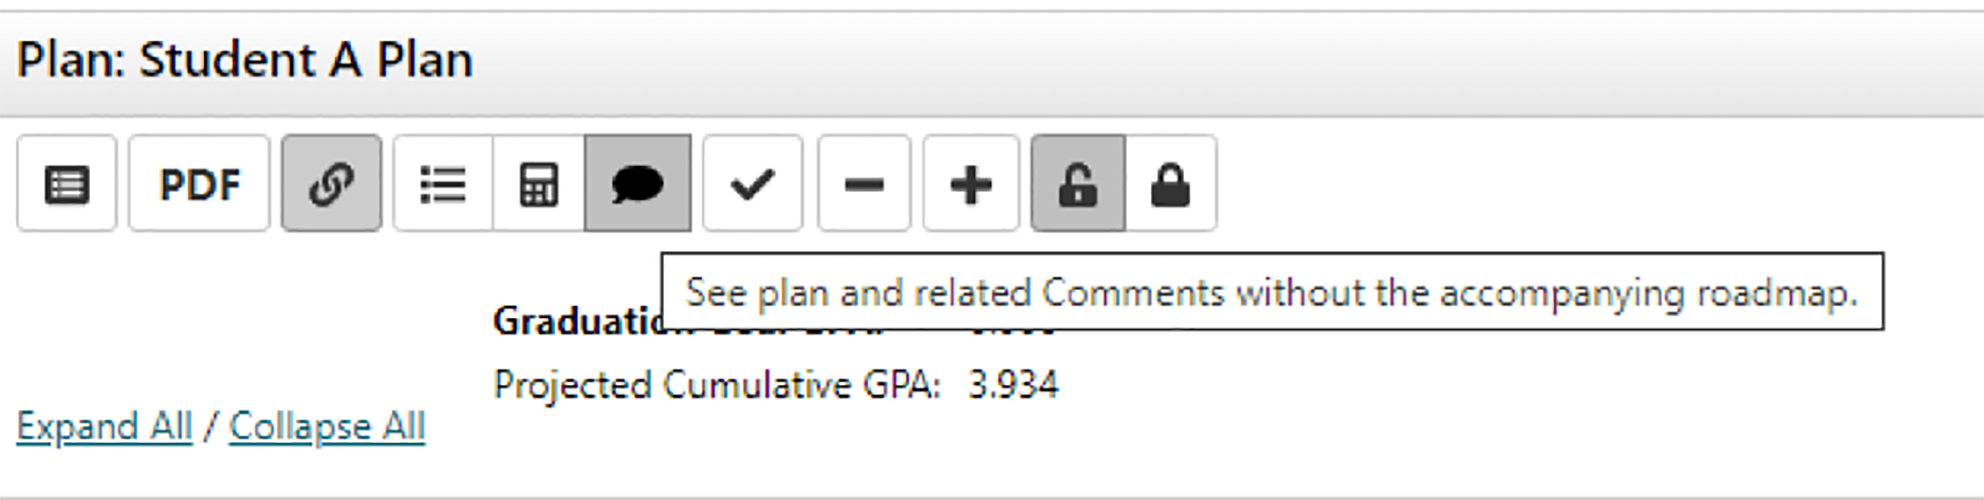
11. Be sure to hit the check mark frequently in the planner to ensure the courses being advised are falling appropriately in the audit.
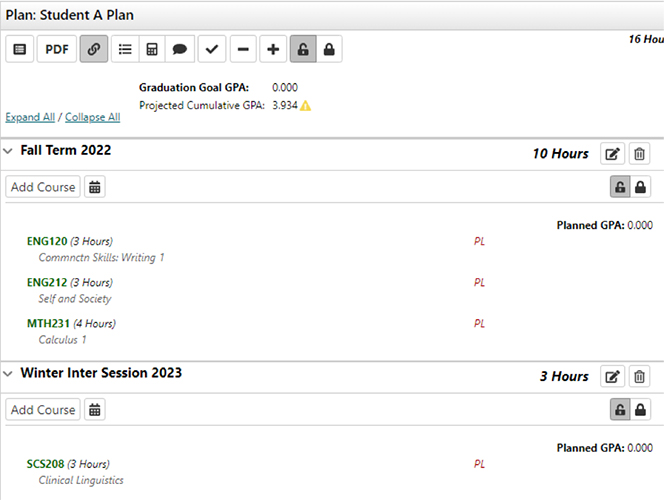
12. You will notice purple calendar icons on the audit, which means the planned courses have been added. They will show up with a grade of “PL” meaning planned.
13. Once all of the courses are chosen, you can click the calendar icon in the specific term you’d like the student to register for. This will push the courses into Schedmule to allow the student to create their schedule.
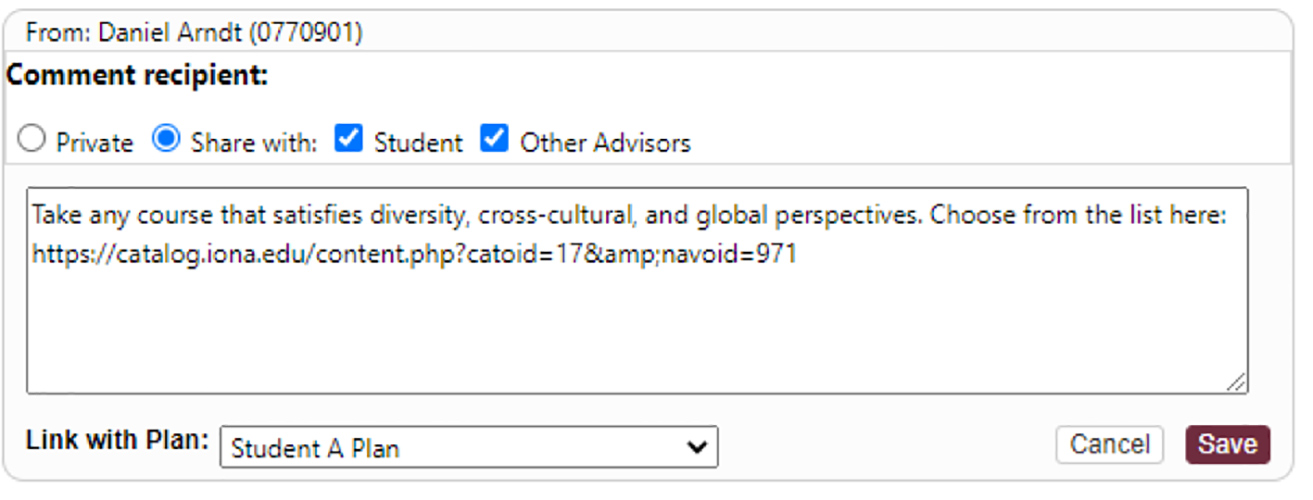
*Additional Info: If you are advising a student to take any class within a particular category (OI/WI/DCCG/Open Elective), comments should be used to relay that information. Click the text bubble to enter a comment.