


Schedmule
Schedmule allows students and advisors to create schedules each term based on student preference. Students are able to input their busy times and other various preferences to create a schedule that works best for them. Schedmule even has an auto-generate function which can generate anywhere from 5 to 100 different schedules that take into account the student’s preferences. Once a student finds their desired schedule, they can push that schedule right into their PeopleSoft shopping cart and complete enrollment.
Schedmule Demo
Busy Times Demo
Instructions
1. Once an advisor finishes selecting classes in a student’s plan, those classes then get pushed over into Schedmule. This can be found in the “schedules” tab in the interactive degree audit.
2. All of the classes that were pushed over will show up on the left side of the screen.
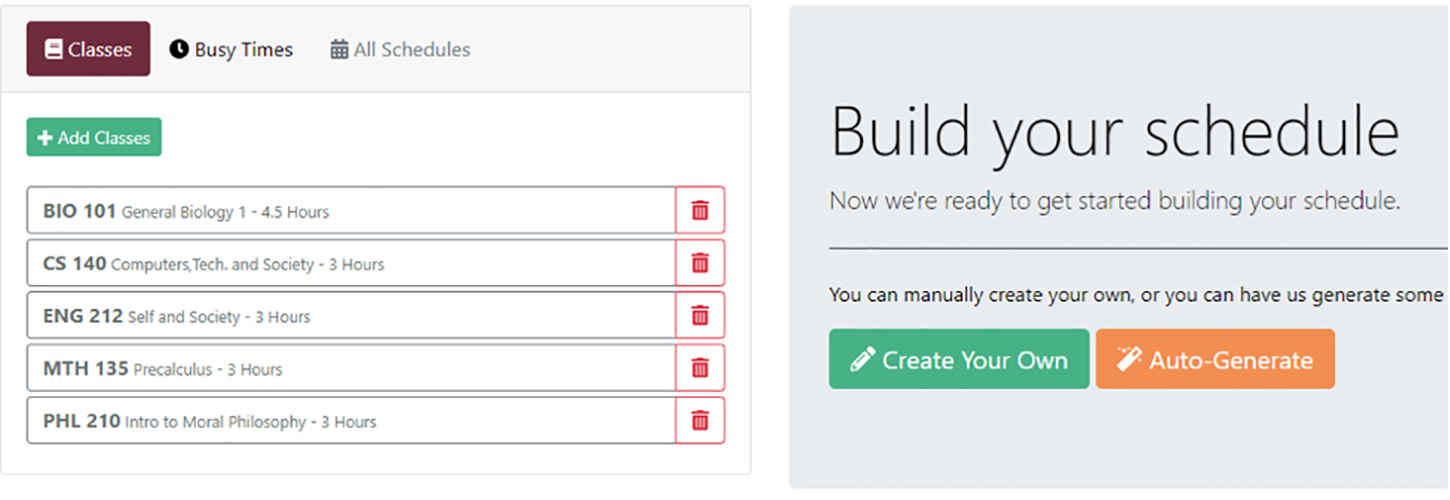
3. NOTE: Please be sure to check the comments on the plan to see if an advisor left any notes to add any particular classes to the list.
4. If there are busy times when a student cannot take class (i.e., work or other obligations), the student can fill those in under the “busy times” header.
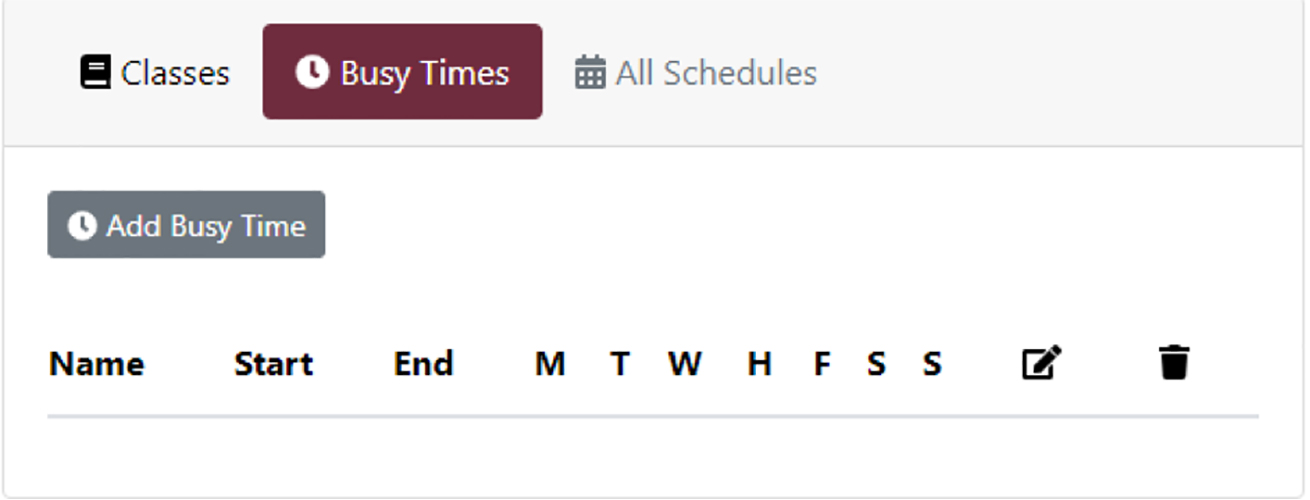
5. Once busy times are added, they will show up underneath the header.

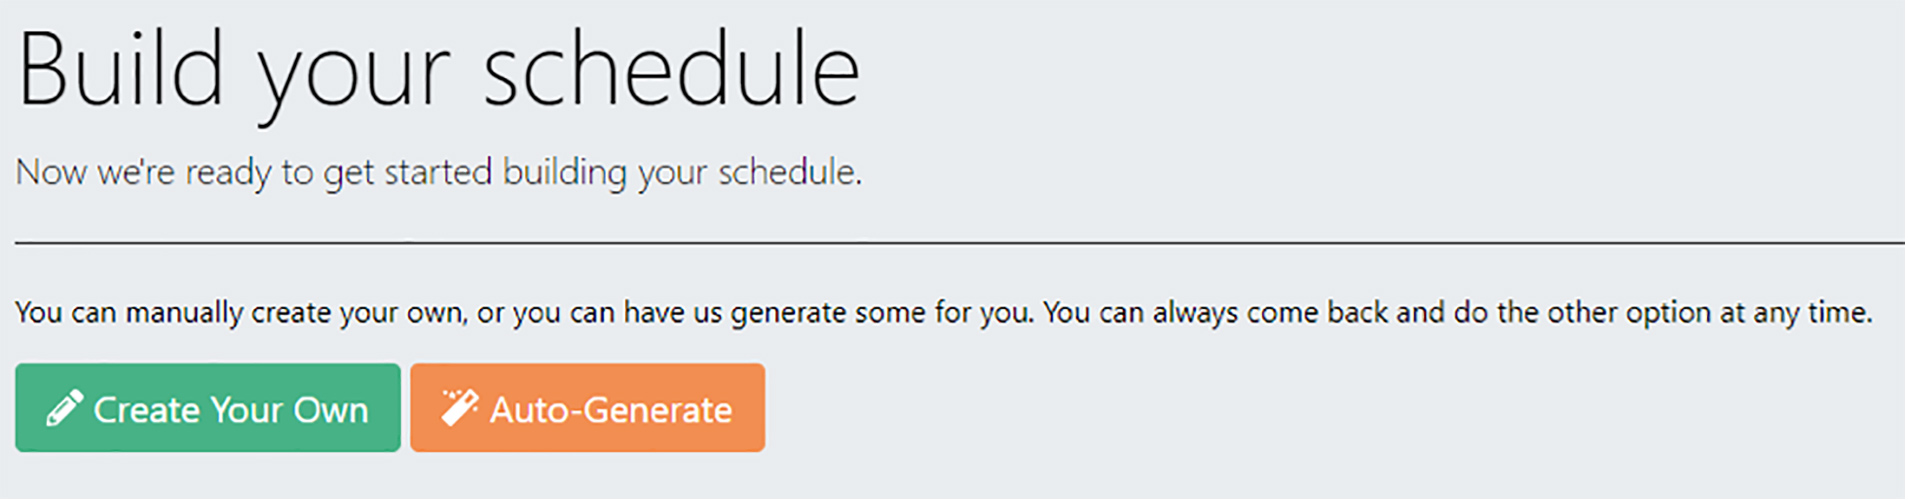
6. The student can then choose to create their own schedule or auto-generate schedules.
7. If a student decides to create their own, they can go course by course and select which sections they wish to take.
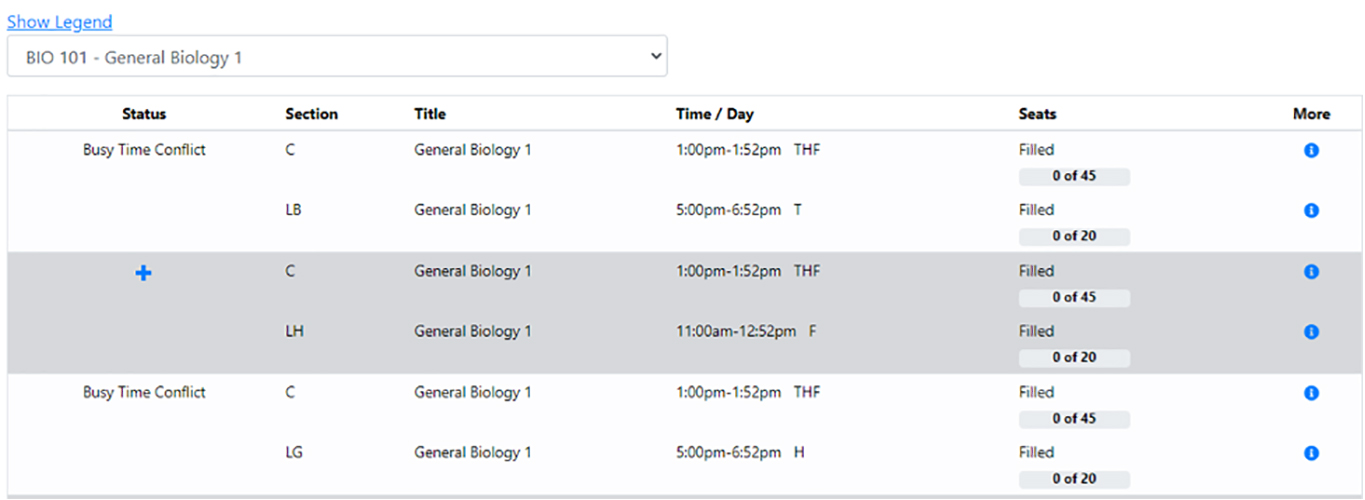
NOTE: If any section conflicts with busy times, those will be noted with “busy time conflict.” It also shows course capacities for each section as well.
8. If a student decides to auto-generate, it will give the student some preferences to choose from.
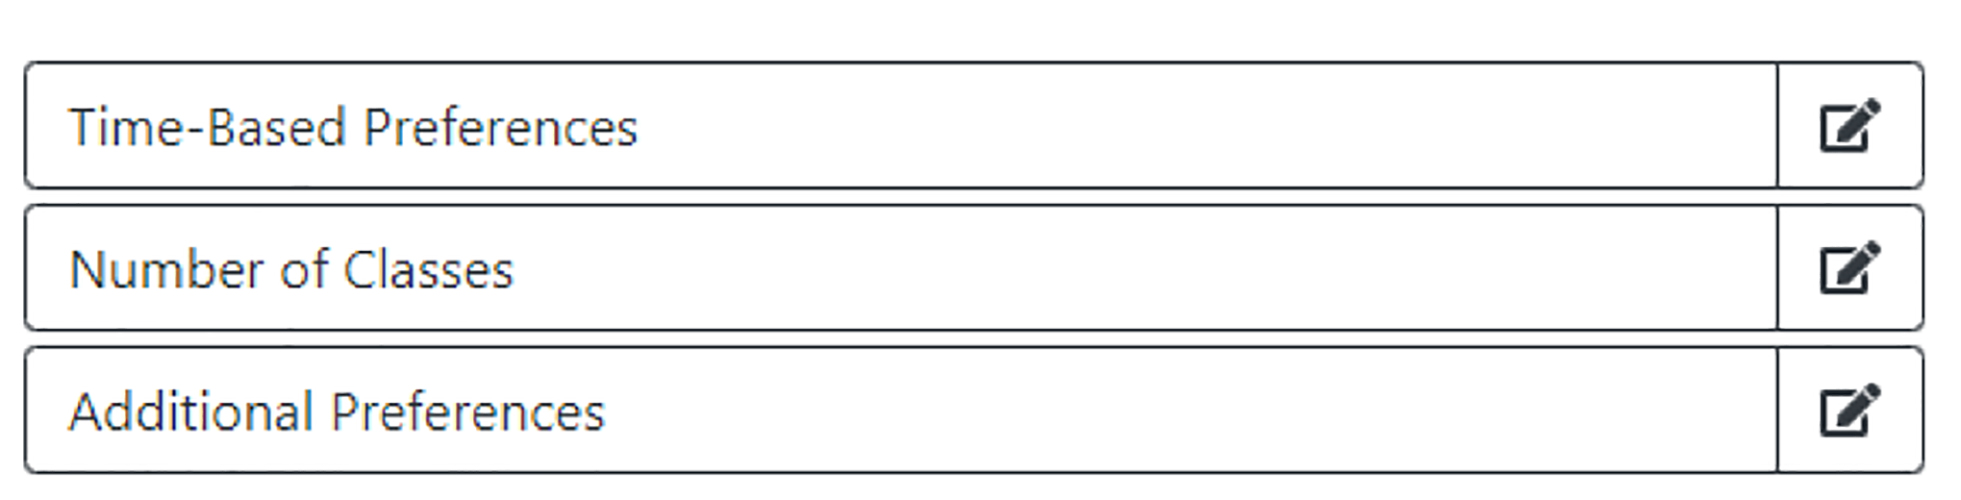
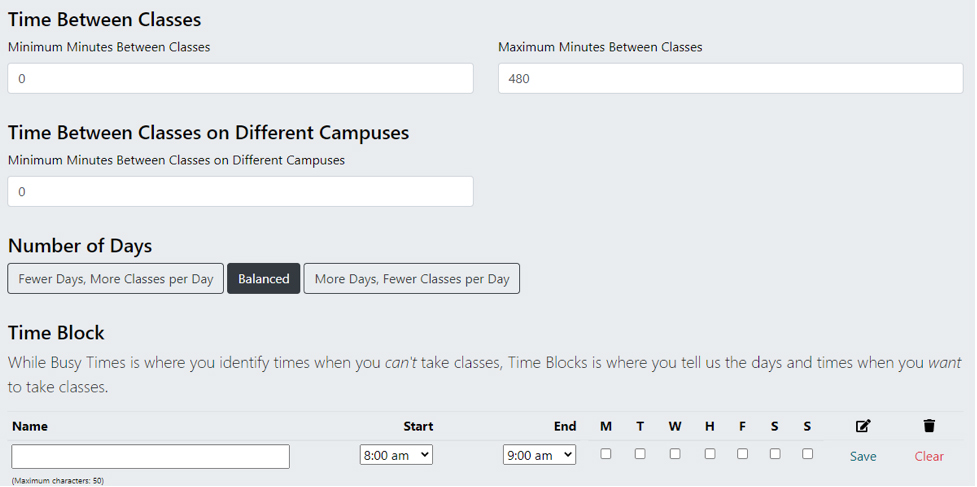
9. For time-based preferences, students can choose how many minutes they want between classes and days/times they wish to have classes.
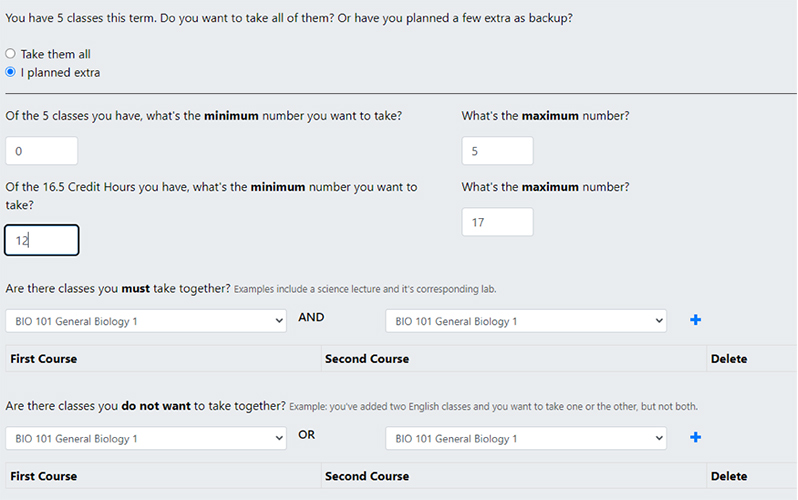
10. For number of classes, they can choose whether to take all classes planned for them or if they’ve planned extra. NOTE: In this section, if a student wishes to go full-time, the minimum number of credits should be 12. Students need special permission to go above 17 credits.
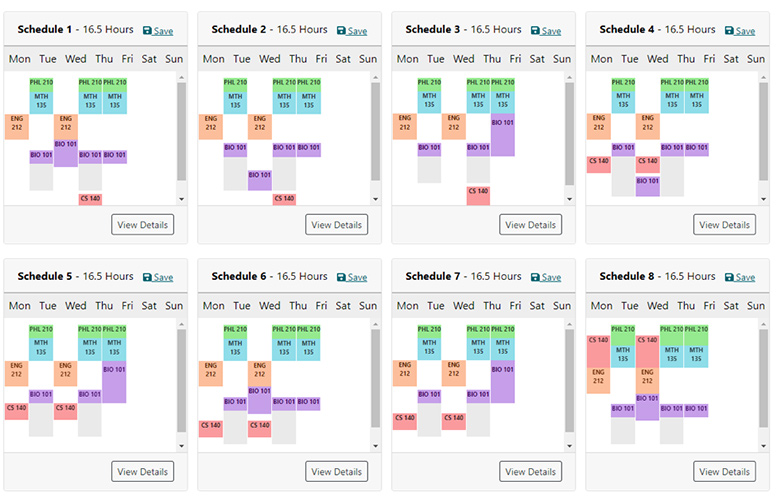
11. Once all preferences are in, make sure to hit “save & finish” at the bottom of the page. Then, the student can choose between 5 and 100 schedules to auto-generate.

12. Schedmule will then provide the student with as many options as possible in a grid format.
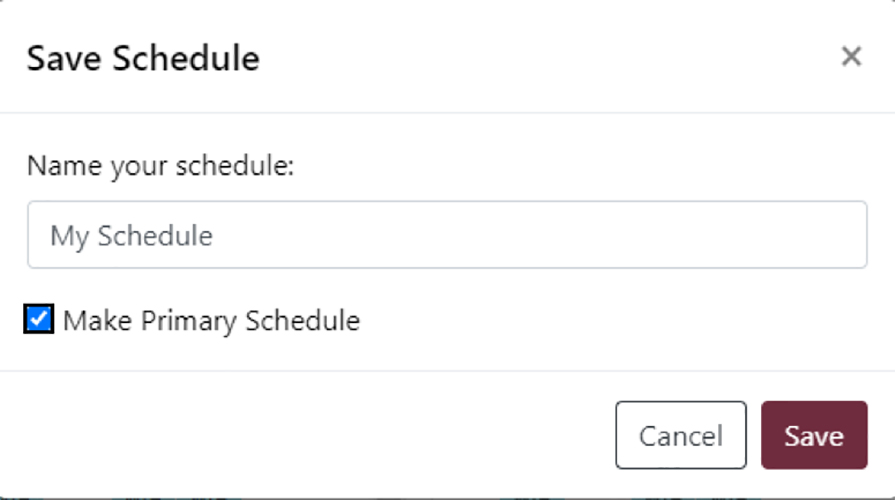
13. Once a student determines which schedule they want, they should click save on that schedule and name it.
14. Once the registration window opens, the student can click on pre-register at the top of the page and the courses will then be pushed into their PeopleSoft shopping cart.
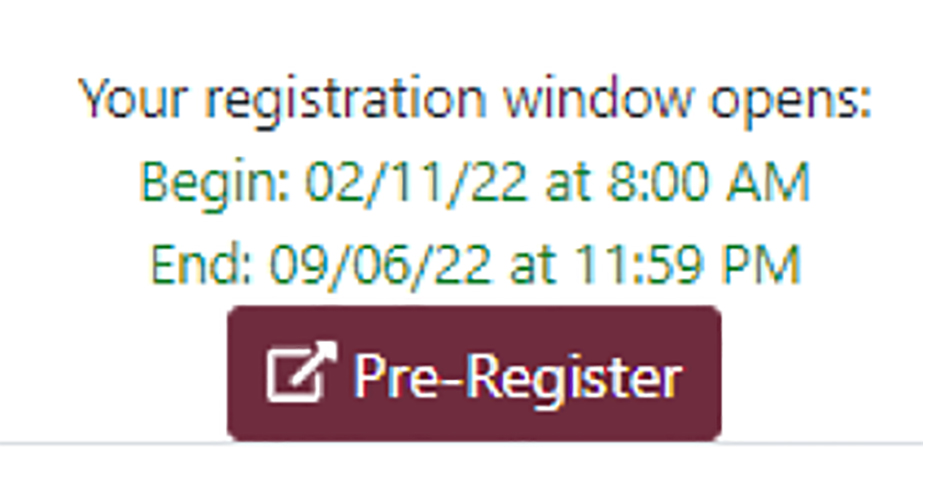
NOTE: Once the pre-register button is hit, student should only make changes to their schedules in PeopleSoft.